
- Sales: 866.780.4678
- Sales Chat
- Get a Quote
Hosting Solutions - 2010 Finalist
Exchange Support
- you are here:
- Fpweb.net
- Support
- Exchange Hosting
- exchange Faq
Exchange Hosting – Frequently Asked Questions
Exchange Hosting
How to Change a Server Name in Exchange 2007
In order to setup an Exchange server, you must first select a domain name for it. This is an important part of the process, as it can be cost considerable time and money to change later. Renaming an Exchange server requires a backup, reinstallation and restore of all data. The process generally ranges from 30 minutes to 6 hours, depending on the amount of data and complexity of the deployment.
It’s important to plan long term for the name of your hosted Exchange server.
If you host Exchange with Fpweb.net and need to change your domain name, contact us so we can give you a quote on the name change, full backup and restore.
How to Create a Storage Group in Exchange 2007
To create the storage group, follow these easy steps:
- Login to the Exchange Management Console
- Under Server Configuration, click Mailbox
Click the Server where you want to put the Storage Group. Click New Storage Group
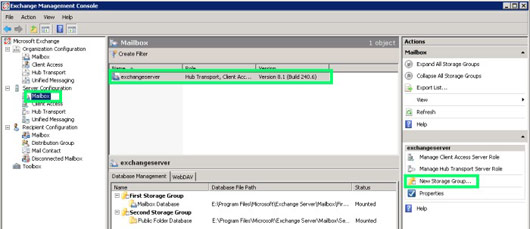
Enter the Storage Group Name. Note: Exchange will auto-fill a default Log Files Path, and System Files Path. Click Browse and select a new location if preferred.
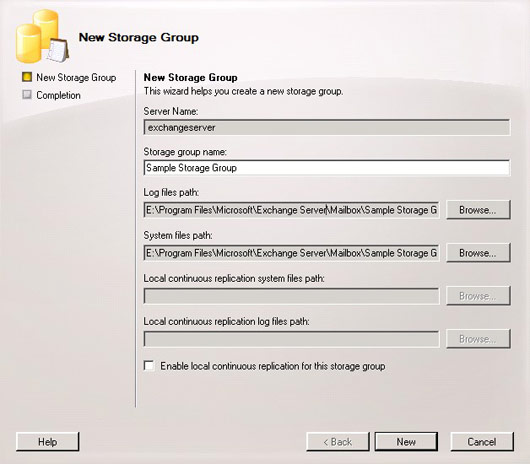
- Click New and your Storage Group will appear in the Storage Group window.
How to Create a Public Folder in Exchange 2007
NOTE: Since Exchange 2007 doesn’t come with a default Public Folder database, you have to first create a Storage Group in which to put the Public Folder Database. For help, read How to Create a Storage Group in Exchange 2007.
- Login to Exchange Management Console
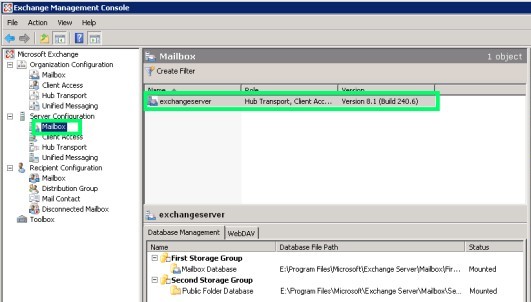
Under Server Configuration, click Mailbox. Click the server where you want to put the public folder.
Right-click the Storage Group that you want to create the Public Folder in.
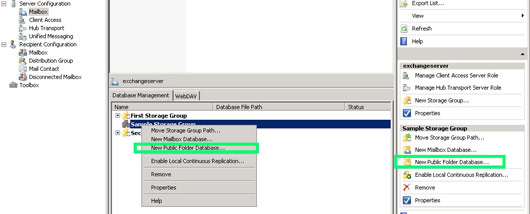
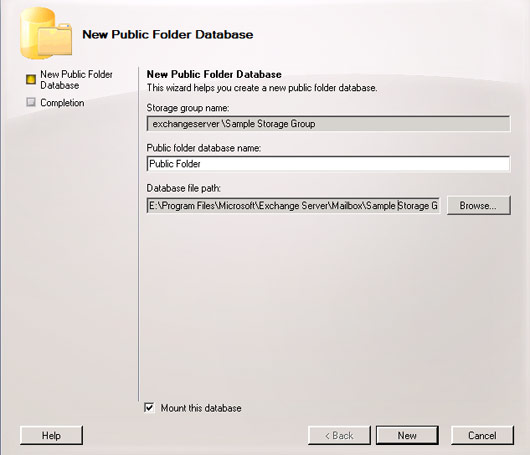
A popup will appear with the Storage Group field pre- populated. Enter the name for your public folder.
Note: Exchange will auto-fill a default Database File Path. Click New to complete the creation of your Public Folder.
How to Delete a Public Folder in Exchange 2007
- Login to Exchange Management Console
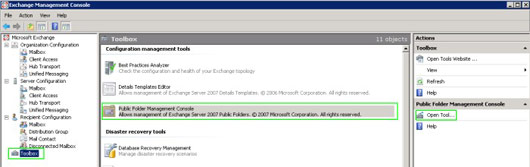
Next, click on Toolbox in the far left pane. Click Public Folder Management Console, then click Open Tool
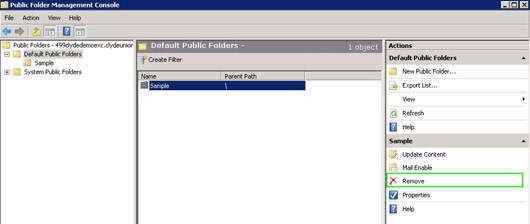
Choose the Public Folder you wish to delete in the middle pane. The Action pane on the right will give you a note to remove. Click Remove. Click Yes to confirm that you wish to remove the public folder.
How to Create User Mailboxes in Exchange 2007
With Exchange 2007, all mailboxes are created and activated from within the Exchange Management Console. You can do this with the New Mailbox Wizard.
- Login to Exchange Management Console
Next, in the left pane, right-click Recipient Configuration >> Mailbox and New Mailbox…
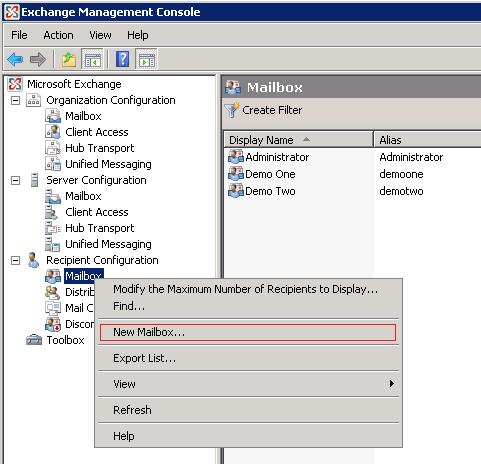
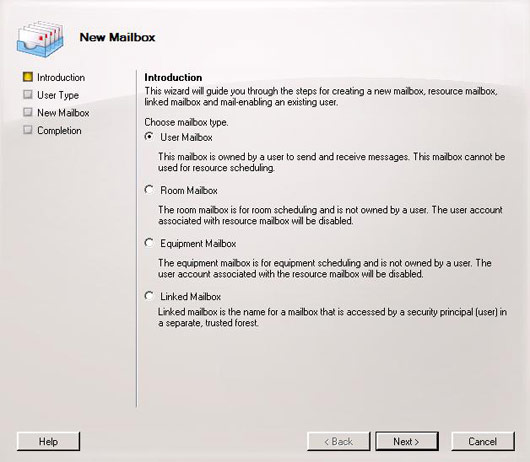
The Wizard will open. Select the type of mailbox you would like to create. In this case, we are going to select User Mailbox.
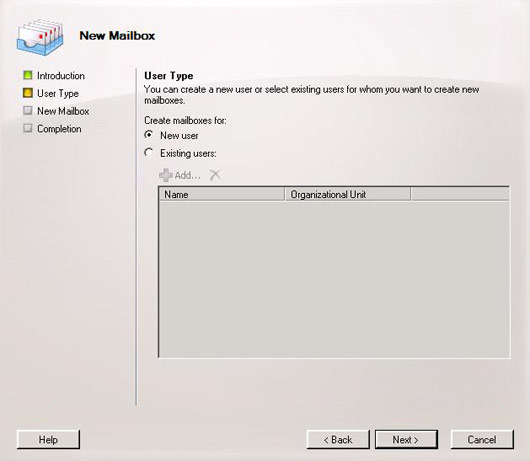
For User Type, you may either select a user that does not currently have a mailbox configured, or select New User.
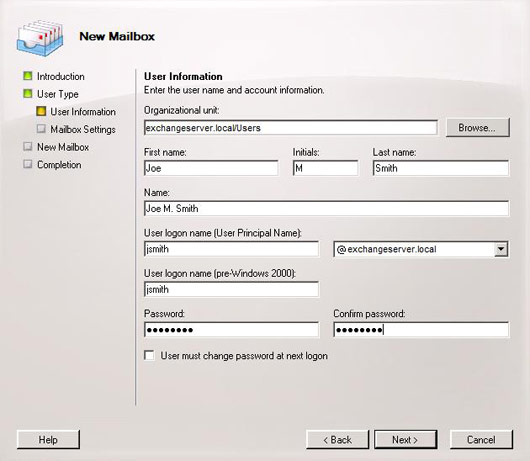
Complete the User’s information for their new mailbox:
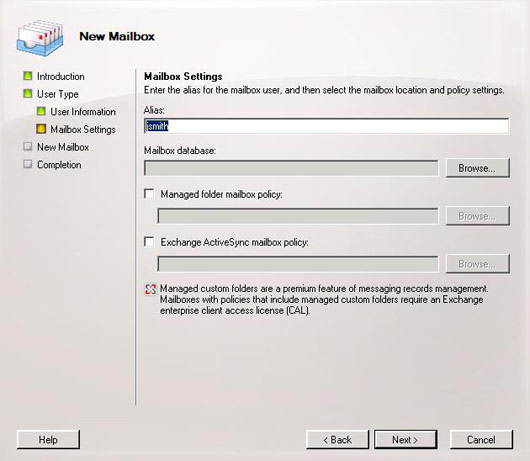
Give the new user an Alias. Select your mailbox database by clicking Browse.
You will now see the new mailbox in the Mailbox user window.
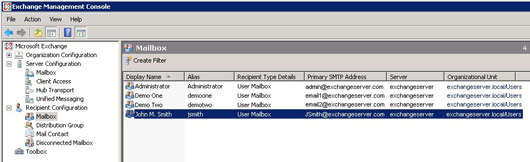
NOTE:Do not create mailboxes within Active Directory. Instead, all creating and enabling for e-mail boxes is done within the Exchange Management Console.
How to Disable & Delete Mailboxes in Exchange 2007
Disabling and/or deleting mailboxes in Exchange 2007 is simple.
- Login to Exchange Management Console.
- Select Recipient Configuration >> Mailbox
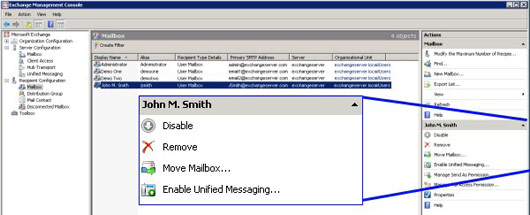
Now, select the mailbox you would like to disable or delete.
On the far right Action pane, select Disable or Delete. Click OK on the popup:
Disable Mailbox

Delete Mailbox

Fpweb.net is an expert provider of hosted Exchange 2007.